Our very own wizened sages, Messrs Mark Haycock and Steve Cooper are here to answer all of your woes, be they mechanical or spiritual. Every month we will be giving advice, as well as some general tips. Don’t forget to send in your own tips too.
1990 Kawasaki ZXR400

Q: This ZXR of mine had lain untouched for 20 years! It was in excellent condition with usual problems, i.e. seized brakes, seized carbs, perished rubbers etc. After a lot of work and a full carb repair kit from Japan it runs and rides okay and passed its MOT first go. The only problem is it hesitates badly when you open the throttle from idle, otherwise it rides fine when going along, sometimes it stalls on small throttle openings, but picks up okay next time, could this just be carb settings? I did set them with gauges when rebuilt, also set float levels! Other than this it is a good machine, if quite heavy.
A: I take it that things such as the air-filter, air-box and exhaust are standard? That makes life easier. Assuming that all the various passageways and jets have been cleaned out and there is no chance of air leaks, for instance at the carb mountings, you need to check that all the settings are as they should be. For your H2 model, they are: main jet: 98 as standard, but ranging from 92 to 102. Main air jet: 100. Needle jet: 6. Jet needle: N77C. Pilot jet: 35. Pilot air jet: 120. Pilot mixture screw: 2.25 turns-out. Starter jet: 45.
To measure the float height two different procedures can be used but as one uses a special Kawasaki tool you will find it easier to measure the heights of the floats when the tang is just touching the float needle. The correct setting is 11mm ± 2mm.
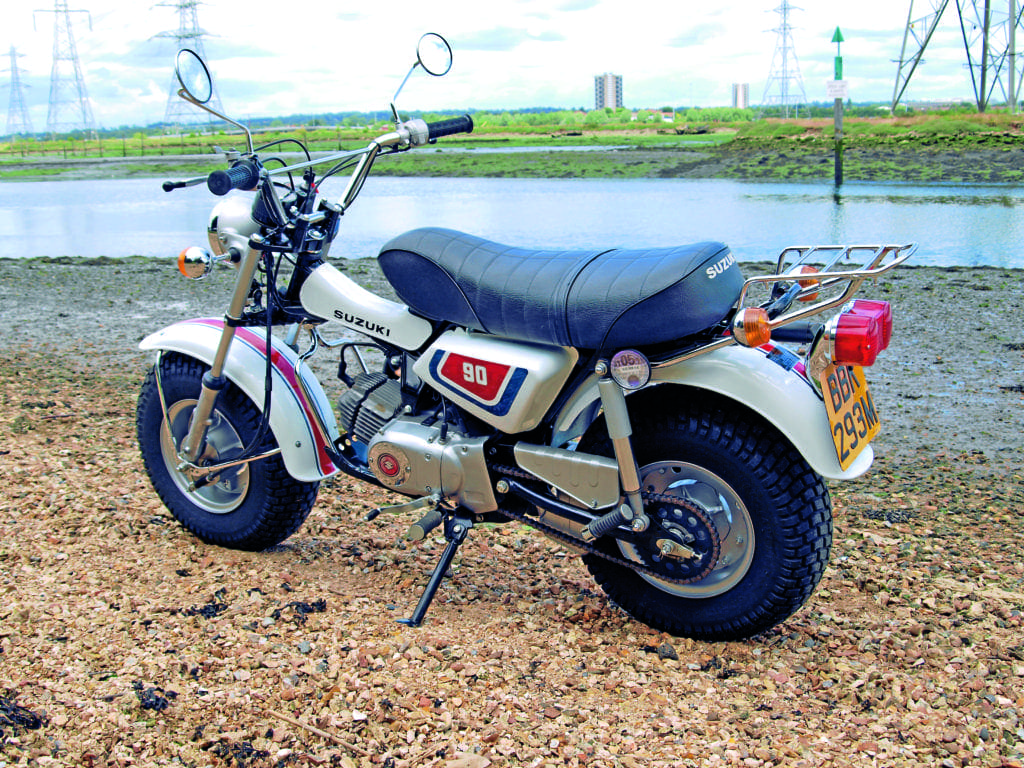
1974 Suzuki RV90

Q: The electrical system on my RV90 has not charged the battery correctly since I bought the bike although the motor ran well. As part of recent restoration work I have had the magneto re-wound by Rex’s Speedshop but in refitting the unit the battery still fails to charge although the ignition runs fine. I have also replaced the diode rectifier and electrical test of this shows it to be good. A voltage check across the (new) battery shows less than 6V with the motor running and this reduces with the lights on until the battery runs down. I suspect a fault in the wiring somewhere although checks show continuity of the wiring is good. I have run dedicated earth lines back to the battery rather than rely on frame-earthing. There is what I think is a ballast resistor wired into the charging circuit but this is not shown on the wiring diagram for this bike or any other variant of the RV90 I can find. Can you advise on how this should be wired into the circuit and what other checks I can make?
A: Your earthing-mod should help, but the charging system on these bikes is not good – though it can be improved. The resistor you refer to is present on some RV90 wiring diagrams and not others but I think this will be irrelevant if you carry out some improvements. As standard, the system is very simple, using only a half-wave rectifier and with a sort of voltage regulation achieved by using a short charging coil when the lights are off, but a longer coil when they are on. The short length coil is connected to the C1 terminal on the main switch by a green wire and this is the one which appears to have a resistor on some variants. I suggest you dispense with the resistor and connect the green and yellow wires together: this will feed the full output permanently to both the lighting and battery charging circuits. Then replace the rectifier with a 6V regulator/rectifier for around £30 from a motorcycle electrical specialist. It would also be a good idea to make sure that all electrical connections (including those in the main switch) are clean and secure and you should have no further trouble. Hope it all goes well.
Q: When renovating the Keihins on my VFR750, two of the pilot needle screws refused to come out: I’ve tried gentle heat and a well-fitting screwdriver, but the brass and alloy have almost welded together! How do I remove them ?
A: This can be very problematic. The usual way is to soak the area in a good penetrating oil (not WD-40 or similar) for a few days and then apply heat, but if you heat only the screw it will help to break the seal and you can do this by pressing a very hot screwdriver on to the screw head. Then more oil, more heat, etc. If that does not work you will probably need to drill a small hole down the centre of each screw (which is easier said than done) and use a screw extractor. Using a left-handed drill (ahem, turned anti-clockwise of course) can help and might be sufficient. Good luck!


